Starting Your Own Health Food Blog
Do you cook healthy meals? Are you a great home cook? Maybe you have great recipes that you have crafted to benefit your health, or the health of your family? Do you want to share those recipes with others? Then you need to build a health food blog.
Maybe you are a stay-at-home mom or dad looking to make a small income to help supplement your monthly income? Are you are a Nutritionist, Personal Trainer, Health & Wellness Coach, Healthcare Professional, or Dietitian, and you want to build your online presence? For whatever reason you have, you too can set up a Health Food Blog to help build your brand.
Follow These Steps Below To Get Started:
I am a huge fan of paying it forward, and many of you have asked me how you can start your own blog to get yourself out there. If you follow through the steps below, you will be set up with a WordPress Blog, Hosting from Bluehost, and links to grab the best looking templates to make your brand look the best it can be and be optimized for Search Engines.
Let’s Get Started!
Disclaimer: Please note that the links below are affiliate links and I will earn a commission if you purchase through those links. I personally use these products for Hacking Salt and would NOT recommend them if I didn’t trust and believe in them. As always, if you do purchase, thank you for helping with the production of Hacking Salt! I can keep bringing you the best low sodium recipes, tips, and ideas! Now, on to the good stuff!
Step 1: Picking a Domain for your Health Food Blog
Choosing a web domain is one of the most important choices you can make for your brand. If it is too long, people may not remember it, or it would take too long to type it out. Try to limit the number of characters to 25 or less. You also don’t want it too be too obscure that people would never consider it as related to what you do.
I went with HackingSalt.com and SuperDadsAlterEgo.com for my two blogs. They both tie into the content that you will find on each blog. Cutting out sodium in your life and being a geeky dad!
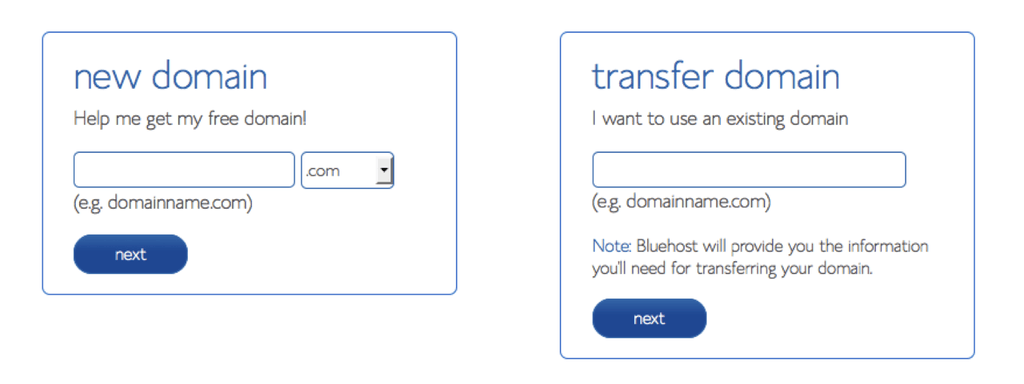
Get creative and brainstorm as many different ideas as possible. Once you’ve narrowed your choices down, head to Bluehost to see if your domain name is available by entering it in the box that looks like this (Start with the box on the left):
Step 2: Picking Hosting for your Health Food Blog
Congratulations! Now you have your domain! Now we need to set up hosting. This is the place your web files will live in a 3rd party server environment, where they can keep your site up and running 24/7. There are many hosting companies out there, but for a WordPress site, Bluehost should definitely be at the top of anyone’s list.
Bluehost is the only hosting service officially recommended by WordPress and has been the number-one recommended hosting service for their platform for almost 10 years. Plus, if you decide to host with Bluehost, you get your domain for free!
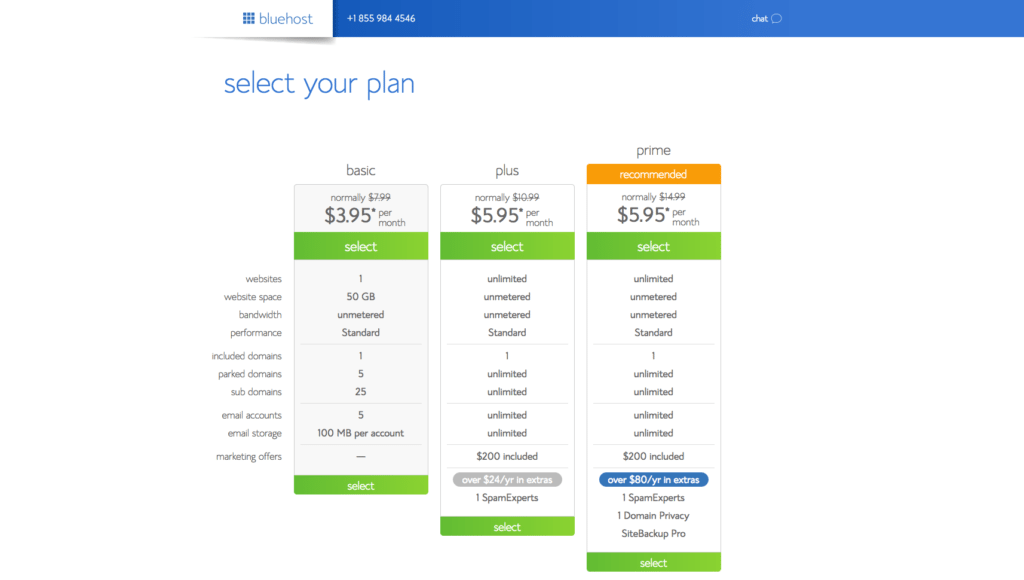
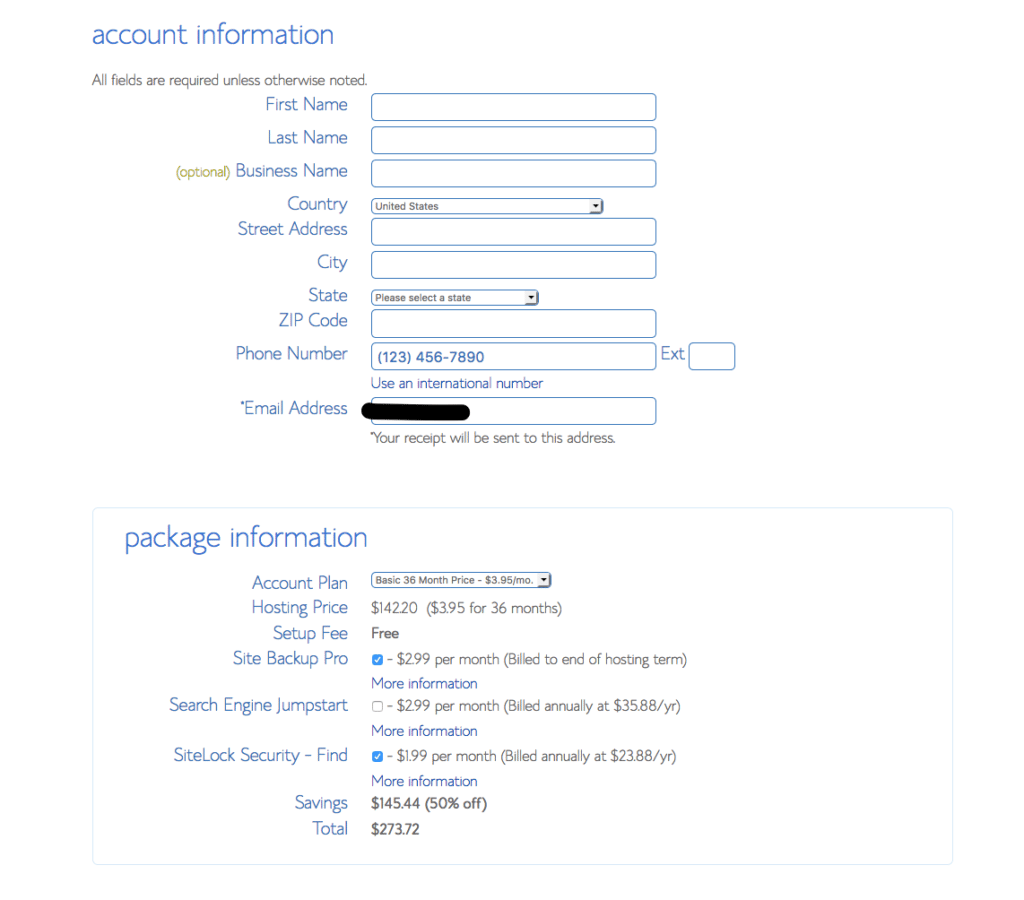
On the next step, they ask you to sign up for a hosting plan. I recommend the Prime plan. You pay a lump fee, but it saves you tons of money when your blog is just starting out and you need to build traffic. You can grow into the Pro plan when you are ready. The basic or starter plan will be a solid choice.
I also recommend you protect your privacy as the owner of the website by choosing the Domain Whois Privacy option. What that does is it keeps your name, email, and address as private. I prefer that rather than having that info public. You can select that in the package settings.
Finally, Bluehost offers a few extra goodies such as sitelock, SEO jumpstart, and secure backups.
Step 3: Installing WordPress as your Health Food Blog Framework
Now that you have the home for your blog (foundation) of a domain and hosting set up, you need to add WordPress as the framework to build your site upon. WordPress is what Hacking Salt and SuperDadsAlterEgo.
Here is how to do it:
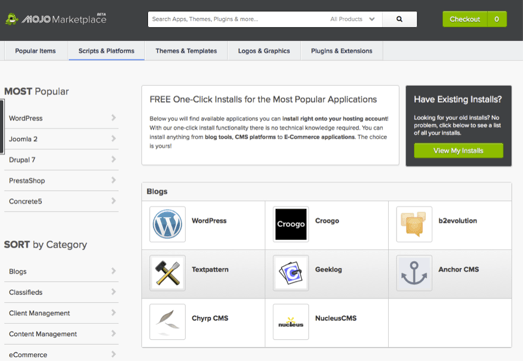
Go to Bluehost, and log into your account. Go to the cPanel, find the section called “MOJO Marketplace,” select “One-Click Installs,” and then click on the WordPress icon located at the blog section at the top of the page.
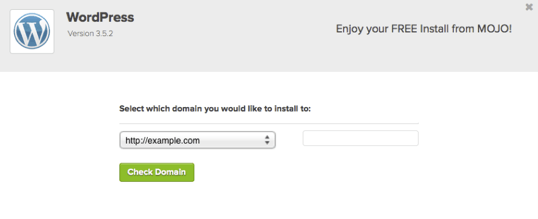
Bluehost will want to ensure your domain is good, and pointing correctly to the hosting files. If required, click the check domain button.
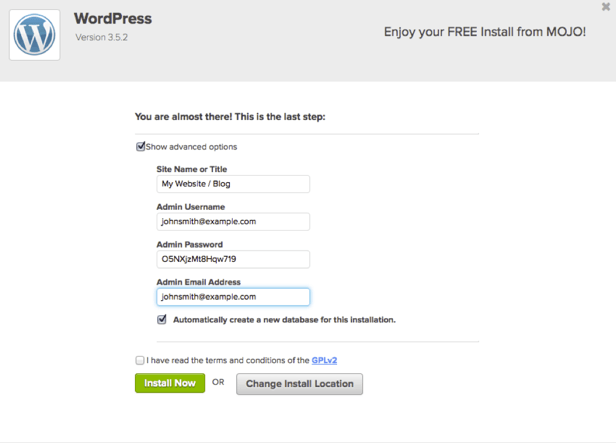
Next you should see a page like this one (below). It confirms you have checked the domain. You need to fill out the information and confirm that you have read the terms and conditions. Then simply press the “install” button.
Now you’ll see the progress page, which will show you how far along the installation is. Once WordPress is fully installed, it will provide you with your site URL, the admin login URL, your username, and password. You will get a copy of this information, except your password, in your email as well. Make sure to keep it in a safe place.
Step 4: Adding Design to your Health Food Blog & Making it Look Great!
Congratulations! You officially have a Health Food Blog! Now we need to make that blog look great. WordPress makes logging into your blog simple. Just click on your login URL (for example, www.WhateverYourNewDomainIs.com/wp-admin) and enter your username and password.
Once logged in, you are ready to select a design theme. A WordPress theme is your blog’s facade. It controls the look, feel, design, and all other front-end elements of your website.
There are several ways to do this, but one of the most common is to select a free theme from WordPress. If you are interested in something fancier, you can buy an affordable WordPress template in the MOJO Marketplace.
There are many great themes there. I wanted to go to the next level and went with a premium theme on the Genesis Framework. I use Foodie Pro Theme for Hacking Salt and Metro Theme for SuperDadsAlterEgo. Any of the incredible themes has a great set of tutorials and help features to help you install your theme.
I’m so glad to see what you will create! Drop me a note with your new site, I’d love to check it out!

